Mosaic jelly (also known as Mosaic Gelatin) is a fun, colorful dessert that combines layers of different flavored jellies in a beautiful, mosaic-like pattern. It’s super easy to make and always impresses at parties or family gatherings. Here’s a simple recipe to create this fun treat!
Mosaic Jelly Recipe
Ingredients:
- 4 different colors of flavored gelatin (Jell-O, or any gelatin of your choice – usually cherry, lime, orange, and lemon work well)
- 2 cups condensed milk (sweetened)
- 2 cups water
- 1 packet of unflavored gelatin (about 7g or 1 tablespoon)
- 1/2 cup boiling water (for dissolving unflavored gelatin)
- Sugar (optional, depending on the sweetness of the flavored gelatin)
Instructions:
-
Prepare the Flavored Gelatin:
- Prepare each of the flavored gelatins (cherry, lime, orange, and lemon or your preferred colors) in separate bowls by following the instructions on the packet.
- Typically, this involves dissolving the flavored gelatin powder in 1 cup of boiling water for each flavor. Stir well until fully dissolved, then allow them to cool for about 30 minutes. Once they are cool, place the bowls in the fridge and let them set for about 2 hours or until firm.
-
Prepare the White Gelatin Layer:
- In a separate bowl, dissolve 1 tablespoon of unflavored gelatin in 1/2 cup of boiling water. Stir well until fully dissolved.
- Add the condensed milk and stir until fully mixed. If you like it sweeter, you can add a little bit of sugar, but it’s generally sweet enough with the condensed milk.
- Allow this mixture to cool slightly, then refrigerate it for about 30 minutes to 1 hour, so that it thickens, but doesn’t completely set.
-
Cut the Flavored Gelatin into Pieces:
- Once the flavored gelatin has set, remove the bowls from the fridge. Use a knife or your hands to cut the set gelatin into small cubes, about 1/2-inch pieces.
-
Assemble the Mosaic:
- Lightly grease a large rectangular or square mold (or you can use a loaf pan, or individual cups if preferred).
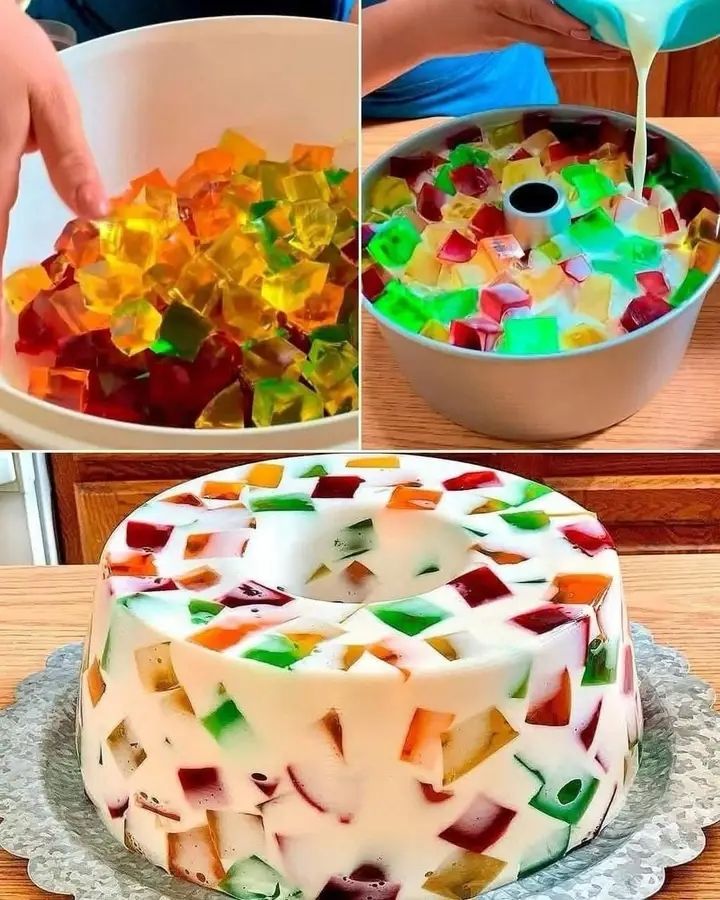
- Start by placing the colorful gelatin cubes into the bottom of the mold, creating a random, mosaic pattern with different colors.
-
Pour the Milk Gelatin Layer:
- Gently pour the condensed milk gelatin mixture over the top of the cubed jellies, ensuring that the colorful cubes are suspended within the milk mixture.
- Make sure the gelatin layer covers the cubes but doesn’t completely dissolve them. Tap the mold gently to remove any air bubbles.
-
Set the Jelly:
- Place the mold in the fridge for 3-4 hours, or until the jelly has completely set and is firm to the touch.
-
Serve:
- Once fully set, carefully unmold the jelly by running a knife around the edges and inverting the mold onto a serving plate.
- Slice into squares or any shape you like to reveal the colorful mosaic pattern inside.
Tips:
- You can experiment with different flavored jellies or use fruit juices and agar-agar for a non-GMO or vegetarian version.
- To make this extra fun, you can add a bit of fruit cocktail (like small chunks of fruit) inside the mosaic to give it more texture.
- If you want the jelly to be more creamy, you can mix some whipped cream into the condensed milk mixture instead of just the milk.
Storage:
- The mosaic jelly can be stored in the fridge for up to 3-4 days. If you have leftovers, just cover them tightly with plastic wrap or store in an airtight container.
This dessert is not only visually stunning but also delicious and refreshing. It’s the kind of treat that’s perfect for summer parties, festive occasions, or whenever you want to impress your guests!