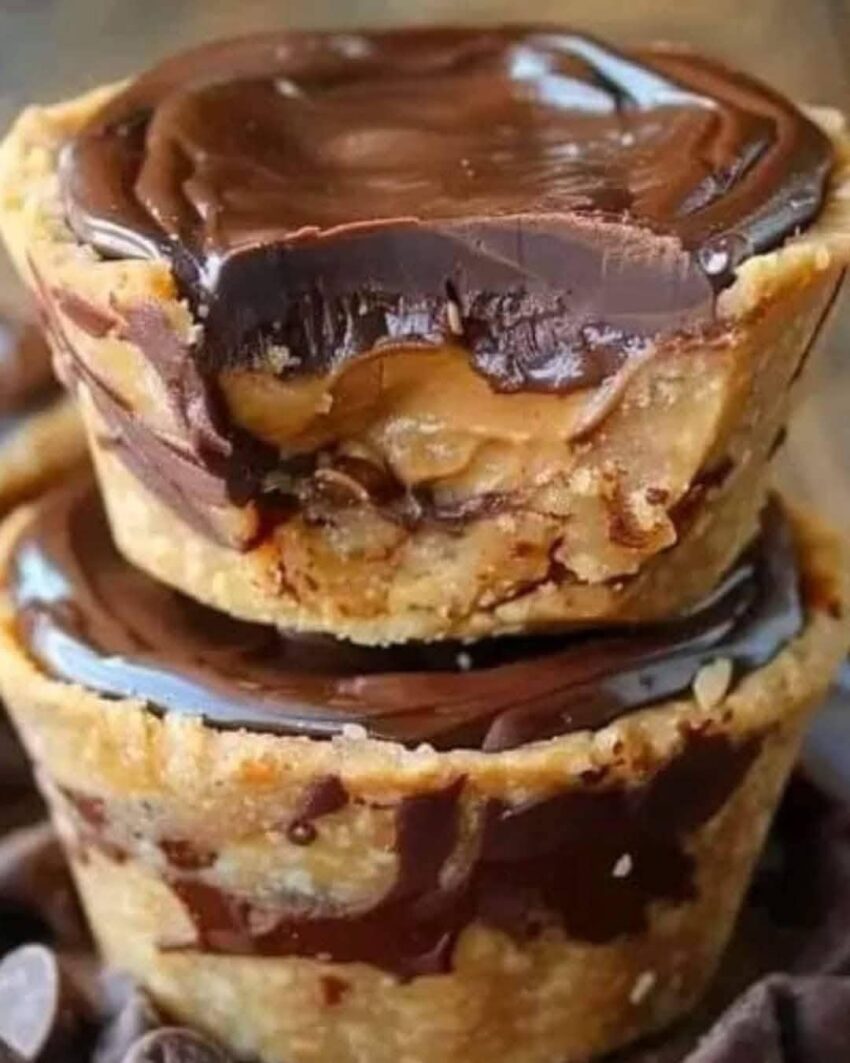
Here’s a recipe for Gourmet Chocolate Peanut Butter Cups—decadent, rich, and perfect for satisfying your sweet tooth! These homemade treats are easy to make, and they have a delicious combination of smooth peanut butter filling and a chocolatey shell.
Ingredients:
For the Peanut Butter Filling:
- 1 cup creamy peanut butter (or crunchy, if you prefer texture)
- 1/2 cup powdered sugar (adjust to taste)
- 1/4 cup unsalted butter, softened
- 1/2 teaspoon vanilla extract
- A pinch of salt (optional, to balance sweetness)
For the Chocolate Coating:
- 1 1/2 cups semi-sweet or dark chocolate chips (or a mix of both)
- 2 tablespoons coconut oil or vegetable oil (to help the chocolate melt smoothly)
Instructions:
1. Prepare the Peanut Butter Filling:
- In a medium-sized bowl, combine the creamy peanut butter, powdered sugar, softened butter, vanilla extract, and salt (if using).
- Mix everything together until smooth and creamy. You can use a hand mixer or a spoon to combine the ingredients until they form a thick, smooth mixture.
- Once mixed, refrigerate the filling for about 30 minutes to make it easier to shape.
2. Prepare the Chocolate Coating:
- In a heatproof bowl, melt the chocolate chips and coconut oil together. You can do this by microwaving in 30-second intervals, stirring after each, until smooth. Alternatively, you can melt them in a double boiler.
- Stir until fully melted and glossy.
3. Assemble the Peanut Butter Cups:
- Line a muffin tin with paper cupcake liners.
- Spoon a small amount of melted chocolate into the bottom of each cupcake liner (about 1 teaspoon), and spread it around to cover the bottom evenly.
- Place the tin in the fridge or freezer for 5-10 minutes, allowing the chocolate to set slightly.
- Once the chocolate has hardened a bit, take the peanut butter mixture out of the fridge. Scoop about 1 tablespoon of the peanut butter filling and shape it into a small ball, then flatten it slightly to fit inside the chocolate cup. Place the peanut butter filling on top of the hardened chocolate.
- After adding the filling, spoon more melted chocolate over the top, covering the peanut butter completely.
- Use the back of the spoon to smooth out the top and make sure the edges are sealed.
4. Chill and Set:
- Refrigerate the cups for at least 1 hour or until the chocolate is completely set and hardened.
- Once they’ve set, remove them from the muffin tin and peel off the paper liners.
5. Serve and Enjoy:
- These Gourmet Chocolate Peanut Butter Cups are ready to enjoy! They’re perfect as a homemade gift or as a treat for yourself. Store them in the fridge to keep them fresh.
Tips:
- Make it Nut-Free: If you prefer a nut-free version, you can substitute peanut butter with almond butter or sunflower seed butter.
- Flavor Options: You can add a pinch of sea salt on top for a salted caramel effect, or drizzle white chocolate on top for a gourmet twist.
- Customize: Feel free to experiment with adding chopped nuts, dried fruit, or even a dash of cinnamon to the peanut butter filling for different flavor combinations.
Enjoy these gourmet chocolate peanut butter cups—they’re the perfect blend of rich chocolate and creamy peanut butter! 😋🍫