Italian bread is known for its crusty exterior, soft, airy interior, and wonderful flavor. It’s a staple of Italian cuisine, and while there are many regional varieties (like Ciabatta, Focaccia, or Pane di Altamura), the most classic and simple Italian bread is a rustic loaf often enjoyed with olive oil, balsamic vinegar, or just as a side to meals.
Here’s a recipe for a basic Italian bread that’s easy to make and perfect for any occasion.
Ingredients:
- 4 cups all-purpose flour (you can also use bread flour for a slightly chewier texture)
- 1 1/2 tsp salt
- 1 tsp sugar
- 1 packet (2 1/4 tsp) active dry yeast
- 1 1/2 cups warm water (about 110°F / 43°C)
- 2 tbsp olive oil (extra virgin preferred)
- Optional: 1 tbsp honey or malt syrup (adds a hint of sweetness)
Instructions:
1. Activate the Yeast:
- In a small bowl, combine the warm water, sugar (or honey), and yeast. Stir lightly, then let it sit for about 5-10 minutes. You should see the mixture bubble or foam up—this means the yeast is active. If it doesn’t foam, your yeast may be expired or the water was too hot, so try again with fresh yeast and slightly cooler water.
2. Prepare the Dough:
- In a large mixing bowl, combine the flour and salt. Create a well in the center.
- Pour in the activated yeast mixture and olive oil into the well of the flour. Use a wooden spoon or your hands to mix everything together until the dough starts to come together.
3. Knead the Dough:
- Transfer the dough to a floured surface and begin kneading. Knead the dough for about 8-10 minutes, adding flour as needed, until the dough is smooth, elastic, and slightly tacky but not sticky.
- If you’re using a stand mixer, use the dough hook and mix for 5-7 minutes on medium speed.
4. First Rise:
- Form the dough into a ball and place it in a lightly oiled bowl, turning it to coat all sides with oil. Cover with a clean kitchen towel or plastic wrap.
- Let the dough rise in a warm place for 1.5 to 2 hours, or until it doubles in size. If your kitchen is cold, you can place the bowl in the oven with the oven light on (but not the heat) to provide a warm environment.
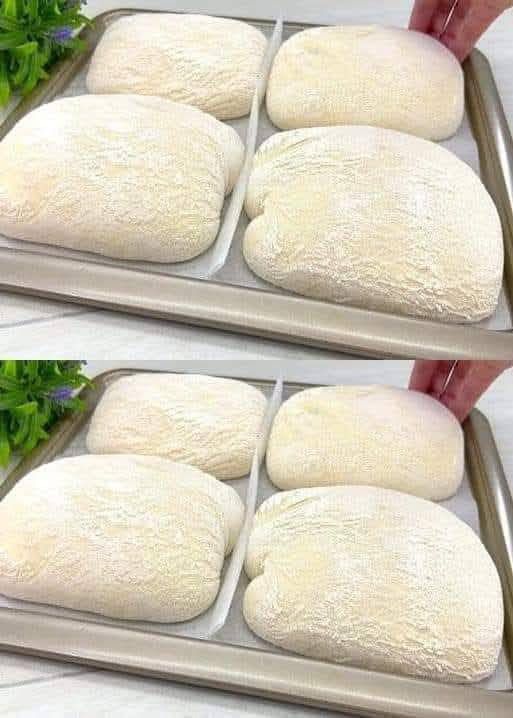
5. Shape the Dough:
- After the dough has risen, punch it down to release the air. Gently turn the dough onto a floured surface.
- Shape the dough into a round or oval loaf, depending on your preference. You can also divide it into two smaller loaves or make a baguette-style bread.
- Place the shaped dough onto a parchment paper-lined baking sheet or a lightly floured baking peel if you plan to transfer it to a pizza stone.
6. Second Rise:
- Cover the shaped dough again and let it rise for another 45-60 minutes, or until it has puffed up. You should see visible air bubbles on the surface.
7. Preheat the Oven:
- While the dough is rising, preheat your oven to 450°F (230°C). If you have a pizza stone, place it in the oven to heat up as well. The stone helps develop that perfect crispy crust.
- Place an empty metal pan or cast-iron skillet on the bottom rack of the oven to create steam during baking. This helps give the bread a crispy, golden crust.
8. Score the Dough:
- Once the dough has risen, use a sharp knife or razor blade to make 2-3 shallow slashes across the top of the dough. This allows the bread to expand and gives it that classic rustic look.
9. Bake:
- Carefully place the dough into the preheated oven. If you’re using a pizza stone, slide the dough onto the stone using the peel.
- Pour about 1 cup of hot water into the preheated pan at the bottom of the oven (be careful of the steam!). This creates steam that helps the bread rise and develop that beautiful crust.
- Bake for about 25-30 minutes, or until the bread is golden brown and sounds hollow when tapped on the bottom. The internal temperature of the bread should be around 200°F (93°C).
10. Cool and Serve:
- Remove the bread from the oven and allow it to cool on a wire rack for at least 30 minutes before slicing. This helps the bread set and enhances the flavor.
Pro Tips for Perfect Italian Bread:
- Hydration: The dough should be soft but not too sticky. If it’s too dry, add a little more water; if it’s too sticky, add a bit more flour while kneading.
- Steam: Creating steam in the oven is essential for a crisp, golden crust. You can also spritz the bread with water during the first 10 minutes of baking for extra moisture.
- Flavor: You can customize this bread by adding herbs like rosemary or thyme to the dough or by brushing the top with olive oil and sprinkling sea salt before baking.
Serving Suggestions:
- Olive oil & balsamic vinegar: Dip slices of fresh bread into high-quality olive oil and balsamic vinegar for an authentic Italian appetizer.
- With pasta: Serve alongside a hearty pasta dish to soak up all the sauce.
- Sandwiches: Use the bread to make panini, sandwiches, or bruschetta.
Storage:
Store any leftover bread in a bread box or wrapped in a clean kitchen towel. To maintain the crust, avoid wrapping it tightly in plastic. For longer storage, you can freeze the bread—just slice it before freezing and reheat slices in the oven when you’re ready to enjoy them!
Enjoy this authentic Italian bread recipe, and feel free to experiment with different flour types or add-ins to make it your own. Buon appetito!